
Option One: Enable Test Signing Mode
Windows includes a “Test Mode” or “Test Signing” Mode feature. Enable this mode and driver signature enforcement will be disabled until you choose to leave Test Mode. You’ll see a “Test Mode” watermark appear at the bottom right corner of your desktop near your clock, informing you that Test Mode is enabled.
You’ll need to run a command from an Administrator Command Prompt to do this. To launch one, right-click the Start button or press Windows+X and select “Command Prompt (Admin)”.

Paste the following command into the Command Prompt window and press Enter:
bcdedit /set testsigning on
If you see a message saying the value is “protected by Secure Boot policy”, that means Secure Boot is enabled in your computer’s UEFI firmware. You’ll need to disable Secure Boot in your computer’s UEFI firmware (also known as its BIOS) to enable test signing mode.

Restart your computer to enter test mode. You’ll see the “Test Mode” watermark appear at the bottom right corner of your desktop and you’ll be free to install whatever unsigned drivers you want.
To leave test mode, open a Command Prompt window as Administrator once again and run the following command:
bcdedit /set testsigning off

To turn off signature enforcement temporarily from Command Prompt on Windows 10, use these steps:
- Open Start.
- Search for Command Prompt, right-click the top result, and select the Run as administrator option.
- Type the following command to enable the test signing mode and press Enter:bcdedit /set testsigning on

- Restart your computer.
After you complete the steps, you can install unsigned drivers on Windows 10, even after restarting the computer.
When you no longer need to install drivers, you can use the same instructions to disable the Windows 10 test mode, but on step 3, make sure to use this command bcdedit /set testsigning off and then reboot the device.
If, while enabling test mode, you receive a message about your device having Secure Boot enabled, then it’s best to use the approach using the Settings app, as shown above.
Disable signature enforcement permanently
To disable driver signature enforcement permanently on Windows 10, use these steps:
- Open Start.
- Search for Command Prompt, right-click the top result, and select the Run as administrator option.
- Type the following command to disable driver signature enforcement on Windows 10 and press Enter:bcdedit /set nointegritychecks on

- Restart your computer.
Once you complete the steps, you should be able to install unsigned drivers on your computer.
If you no longer need the feature, you can revert the changes with the same instructions, but in step 3, make sure to use this command bcdedit /set nointegritychecks off and then restart the device.
Option Two: Use an Advanced Boot Option
There’s also another way to do this. You can use the advanced boot options menu to boot Windows 10 with driver signature enforcement disabled. This isn’t a permanent configuration change. The next time you restart Windows, it will boot with driver signature enforcement enabled—unless you go through this menu again.
To do this, get to the Windows 8 or 10 advanced boot options menu. For example, you can hold down the Shift key while you click the “Restart” option in Windows. Your computer will restart into the menu.

Select the “Troubleshoot” tile on the Choose an option screen that appears.

Select “Advanced options”.

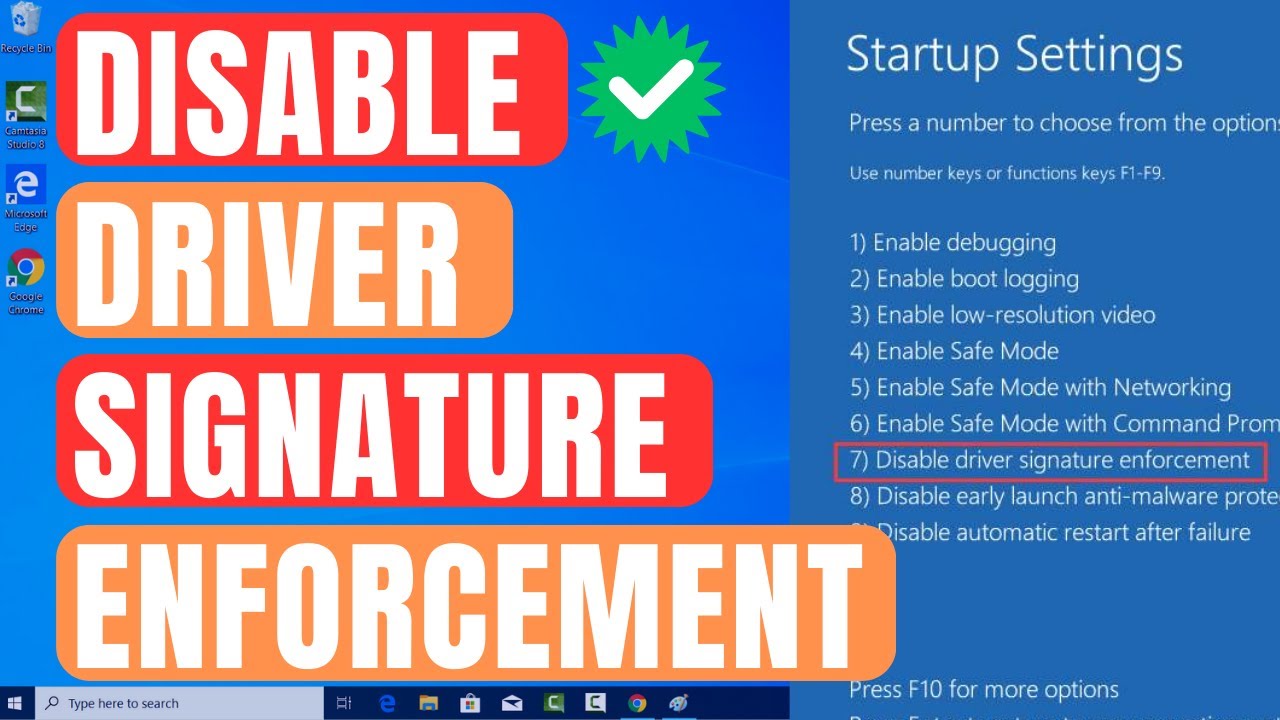
Click the “Startup Settings” tile.

Click the “Restart” button to restart your PC into the Startup Settings screen.

Type “7” or “F7” at the Startup Settings screen to activate the “Disable driver signature enforcement” option.

Your PC will boot with driver signature enforcement disabled and you’ll be able to install unsigned drivers. However, the next time you restart your computer, driver signature enforcement will be disabled—unless you go through this menu again. You’re now free to install drivers that haven’t been officially signed by Microsoft.
Option Three: Use Local Group Policy Editor
Another solution is to use the Local Group Policy Editor. Keep in mind that you have to be careful while messing with the Policy Editor, and don’t modify anything else.
To disable the driver signing code, follow the steps:
- On your PC open Local Group Policy Editor: press the Win+R hotkeys and in the Run box enter gpedit.msc.
- In Local Group Policy Editor, from the left panel, click on User Configuration.
- Then, from the main window double-click on Administrative Templates.
- From the menu that will open double-click on System and then go to Driver Installation.
- Select the Code signing for device drivers entry.
- Select Enabled and from the dropdown located beneath, change to Ignore.
- Click Ok and apply your changes.
- Restart your Windows 10 system in the end.
شرح باللغة العربية: كيفية تعطيل فرض توقيع برامج التشغيل
بسبب القيود الأمنية، يمنع ويندوز تثبيت التعريفات غير الموقعة. ومع ذلك، هناك طرق بسيطة لتجاوز هذا الأمر عند الضرورة. سنستعرض فيما يلي الخطوات اللازمة بكل وضوح.
أولاً: تفعيل وضع الاختبار (Command Prompt)
علاوة على ما سبق، يمكنك استخدام “وضع الاختبار”. هذا الخيار مفيد جداً لأنه يبقى مفعلاً حتى تقوم بإلغائه يدوياً.
- الخطوة 1: افتح موجه الأوامر (Command Prompt) بصلاحية المسؤول.
- الخطوة 2: اكتب الأمر التالي:
bcdedit /set testsigning onثم اضغط Enter. - الخطوة 3: بناءً على ذلك، قم بإعادة تشغيل الجهاز لتفعيل التغييرات.
ثانياً: خيارات الإقلاع المتقدمة (حل مؤقت)
من ناحية أخرى، إذا كنت تفضل حلاً لا يغير إعدادات النظام بشكل دائم، فاستخدم هذه الطريقة. فهي تعطّل الفحص لمرة واحدة فقط.
- اضغط على مفتاح Shift مع خيار Restart.
- بعد ذلك، اختر Troubleshoot ثم Startup Settings.
- أخيراً، اضغط على رقم 7 من لوحة المفاتيح عند إعادة التشغيل.